Want to find the answer quick?
Xata workflow
This guide introduces the core Xata workflow and outlines the process of configuring a project for branching and migrations using GitHub in conjunction with Netlify or Vercel. After completing the configuration, pull requests created in GitHub will generate Xata database previews that link to preview deployments in either Vercel or Netlify. After merging the pull requests, Xata will perform database migrations in sync with your code, resulting in the deployment of changes to production.
The following tutorial leverages our starter example database, but the methods used can be applied to any Xata database.
Prerequisites
This guide assumes:
- You have installed the Xata CLI on your machine.
- You are familiar with our Getting Started guide.
Integration and account setup
To perform automatic migrations and previews, connect Xata to the downstream services. These steps can be performed at any time with an already existing, or a brand new database.
Link your Xata account to your GitHub account
If you haven't already signed up to Xata using your GitHub account, you will need to do so before you continue.
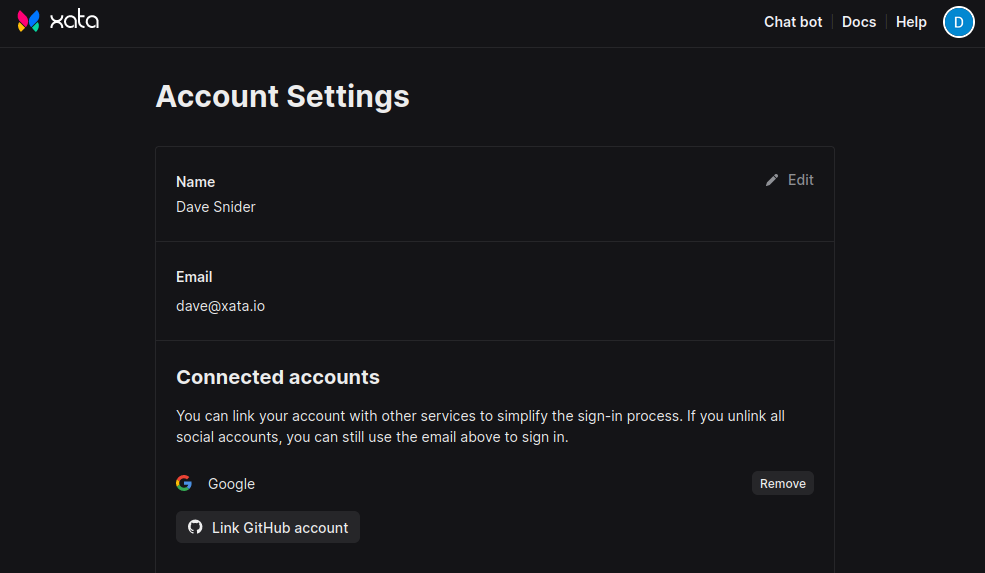
After you create your account, go to the Account Settings page. You can access the page by clicking your avatar in the top right corner of the application. In the "Connected accounts" section, a list of any external services linked to your Xata account is displayed.
Click the GitHub button and authorize the website to work with Xata. This will grant access to your GitHub account so that Xata can read and write to your repositories when migrations occur, as well as synchronize your code with your database.
Install the Xata integration for GitHub
On any database view, click the Settings link near the top of the page and click into the GitHub integration. If you missed the last step about connecting your Github account, you'll need to follow the links provided to first connect your account.
The Xata GitHub application must be installed either at the user level (for personal repository access) or at the organization level (for access to your team's repositories). Adding the application to both will allow you to link your Xata database to repositories from either source.
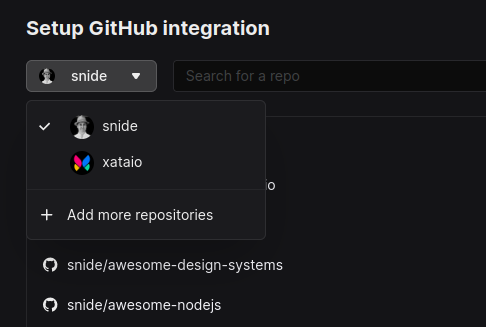

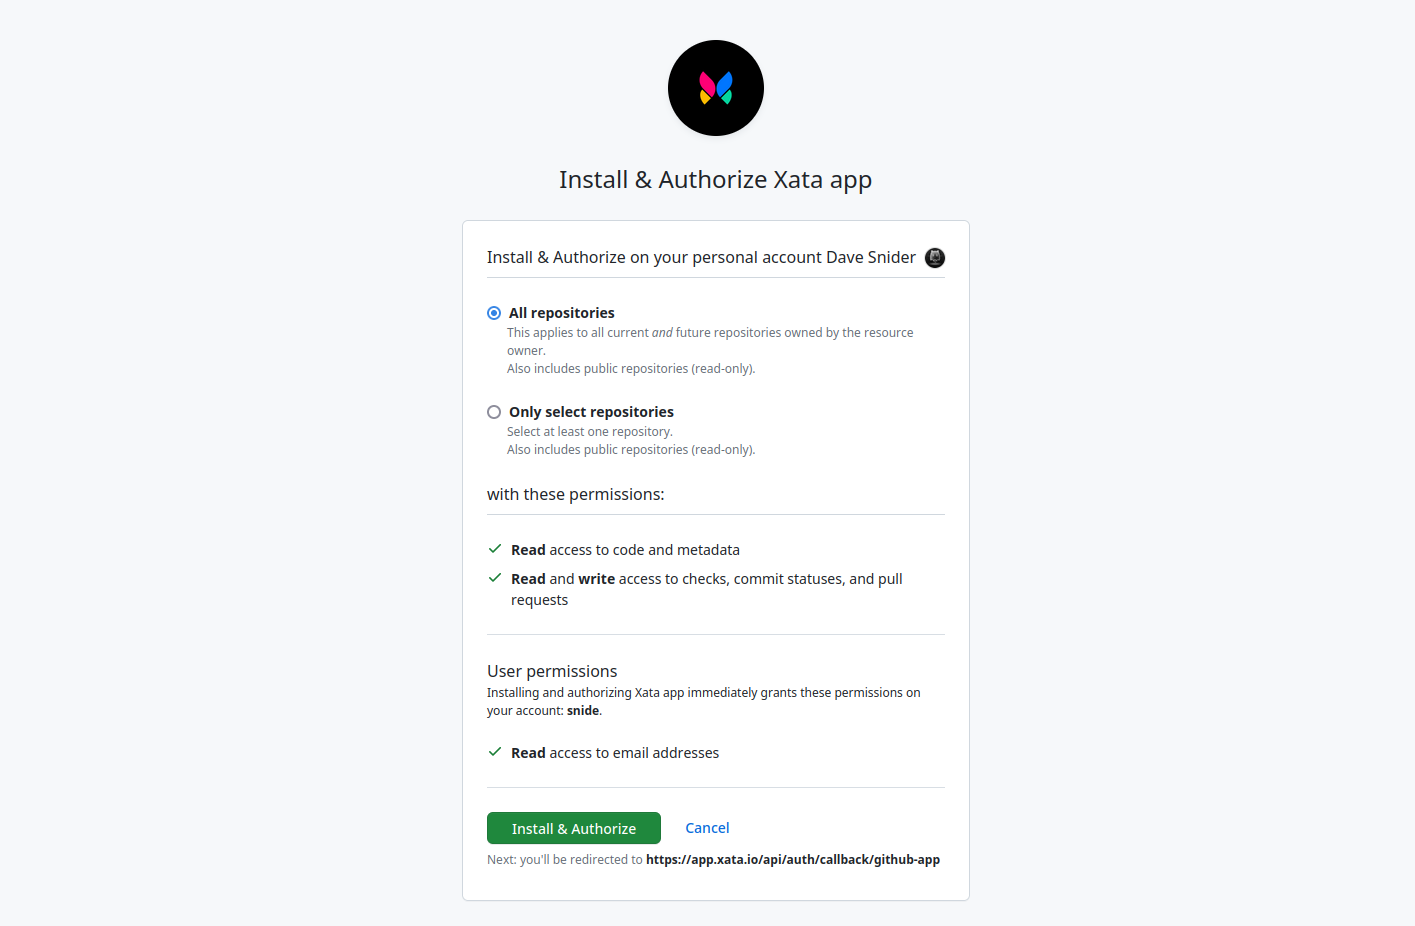
After permissions are granted, a list of GitHub repositories that you can connect to your database is displayed. You can only connect one repository to a Xata database. Click Connect to link the Xata app with your repository and keep everything in sync.
Install the Xata integration for Vercel or Netlify
Similar to the GitHub integration performed in the previous step, install the Xata app to your website hosting provider. Currently, Xata provides integrations for Netlify and Vercel.
On the Settings page click the host you prefer. The steps may vary slightly between different hosting services, but ultimately, Xata database previews will automatically connect to any deployment previews created by your hosting service during the pull request process.
Installation for Vercel
Xata provides an official Vercel integration that you'll need to enable to view previews. Click Settings in the top navigation for any Xata database, then click the Vercel integration from the listed options. This directs you to Vercel's website, where you can select the organization you would like to attach to the Xata database.
Your personal account and your team's organization account are listed. Permissions are required to adjust the .env variables that instruct Vercel previews to point to the correct Xata database preview.

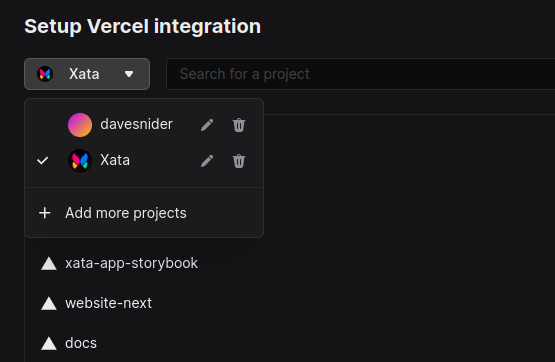
After permissions are granted, a list of Vercel projects that you can connect your database to is displayed.
NOTE: If you have multiple organizations, you will need to add the Xata app to all of them by clicking Add more projects.
The following configuration is linked to a personal account for Dave Snider as well as his Xata team account. Click Connect in the Vercel project you wish to have linked database previews for.
Installation for Netlify
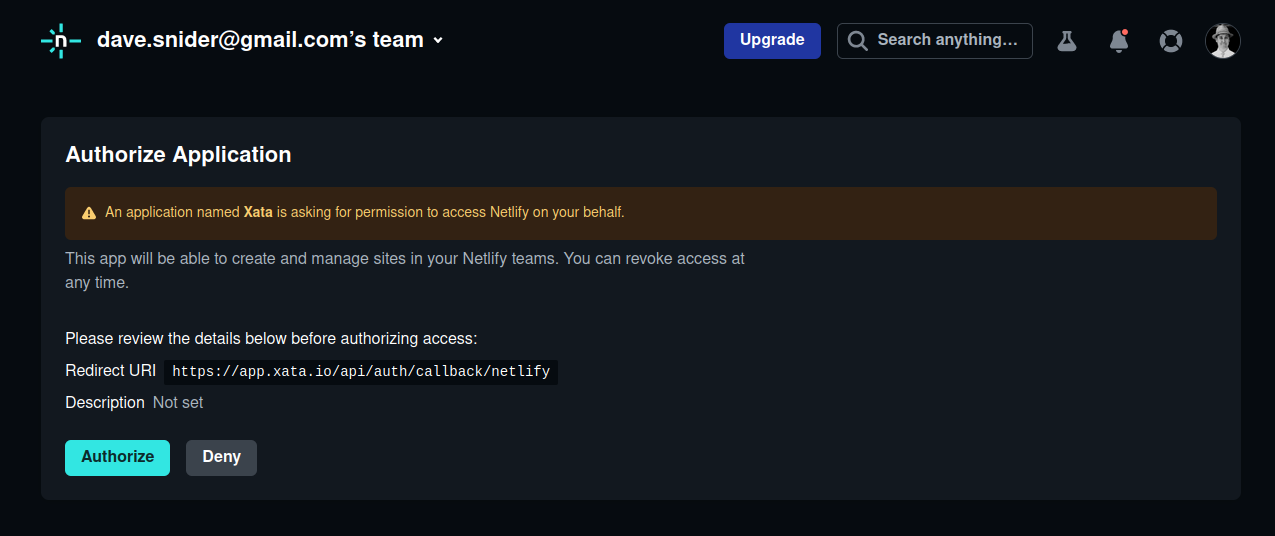
Xata provides an official Netlify integration you'll need to enable to provide previews. Click Settings in the top navigation for any Xata database, then click the Netlify integration from the listed options. This will transport you to Netlify's website, where you'll need to authorize the application and grant it permissions. Specifically this integration will allow Xata to automatically configure your environment variables on your Netlify site.
Beyond this step, you'll also need to install the @xataio/netlify plugin as a development dependency into your application.
npm install -D @xata.io/netlify
Finally, add the following to your netlify.toml file in the root of your application.
1 2[[plugins]] package = "@xata.io/netlify"
Branching your database
With the GitHub and Vercel or Netlify integrations installed, you can now follow a typical code-based PR workflow to migrate your database through code and provide previews during PRs. At a summary level, you'll find yourself performing the following workflow loop to branch, review and merge your changes. We'll go through each step individually.
- Create and checkout a new code branch with
git branch my_featurefor your feature. - Create a new Xata branch with
xata branch my_feature, then update your.envfile to point to themy_featurebranch. - Perform a
xata pull my_featurecommand in your local project to pull in the changes, generating the necessaryclientandmigrationcode files. - Continue to edit your code and database as needed
- Commit the migration files (along with any other code) and create a new GitHub PR.
- The Xata App will add a comment to your PR with a health check of your migration. It will also generate a
preview-my_featurebranch with data copied from your source branch. - If Netlify or Vercel is also present in that repository, the deployment previews for your application will use the Xata
preview-my_featureas the source for those previews. - On merge of the PR, Xata will perform an automatic migration, applying your branch schema to your target branch.
Create a new Git branch
Similar to a project without Xata, you'll want to start your project off by creating a new Git branch for your changes. Let's assume a new feature called my_feature that we're branching from main.
git branch my_feature
git checkout my_feature
The Xata CLI creates client and migration files that will vary based upon the database you are pointing to. Due to this we always recommend creating a new git branch when making changes to a Xata database's schema.
Initialize Xata, and create a branch
In the same Xata database that we installed the integrations to, create a new database branch using either the UI or the CLI. Although the name of the branch does not need to match the Git branch we made earlier, it's typically good practice, so we'll use the CLI to make a my_feature branch. Xata will assume you are branching from your main database branch unless told otherwise.
## If you haven't done so yet, you'll need to do a one-time initialization to let Xata know which database to use
xata init

## Once initialized. Create a new a branch from main
xata branch create my_feature

## The above command is the equivalent of
xata branch create my_feature --from main
If either of these commands fail, you likely haven't installed the Xata CLI locally. Please run through the installation guide and return here after.
Once your database is initialized and your branch is created you should now see a my_feature branch within the UI.
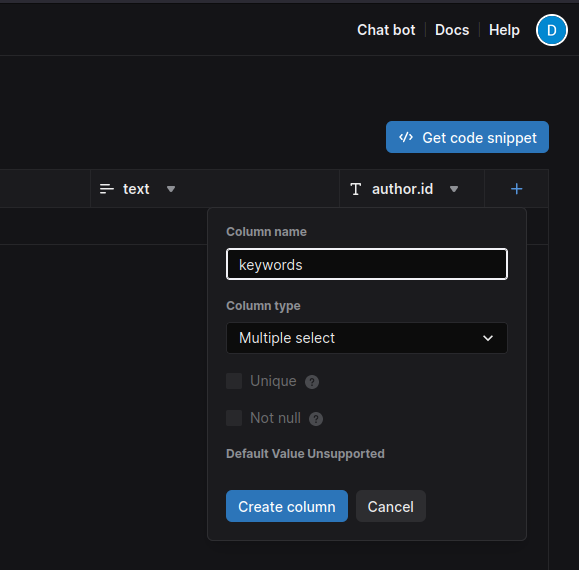
At this point we can make changes to our schema in our new my_feature without worrying about breaking our production database. Using the UI, we'll create a new keywords column with the multiple select type.
To tell our local environment to use the my_feature branch we set up we'll need to also edit our .env file and add the following line. This tells Xata which branch to point to when running development. For more information about API keys and the .env file, check out our installation guide.
XATA_API_KEY={your_key_here}
XATA_BRANCH=my_feature
Pull in Xata branch changes to the code
As you edit the schema to your database branch you'll want to pull down any client information (like TypeScript types) and migration files. Unlike git, when running xata pull commands you will always need to reference the branch you want to pull from. To pull in the changes to our my_feature branch run the following command.
xata pull my_feature
On completion, notice Xata updated our client files in src/xata.ts and added migration files in the .xata/migrations folder. The later files are needed for GitHub to pick up on the changes we've made. Each time you make changes to your database branch, you will need to run xata pull my_feature.
Commit your code, and create a GitHub PR
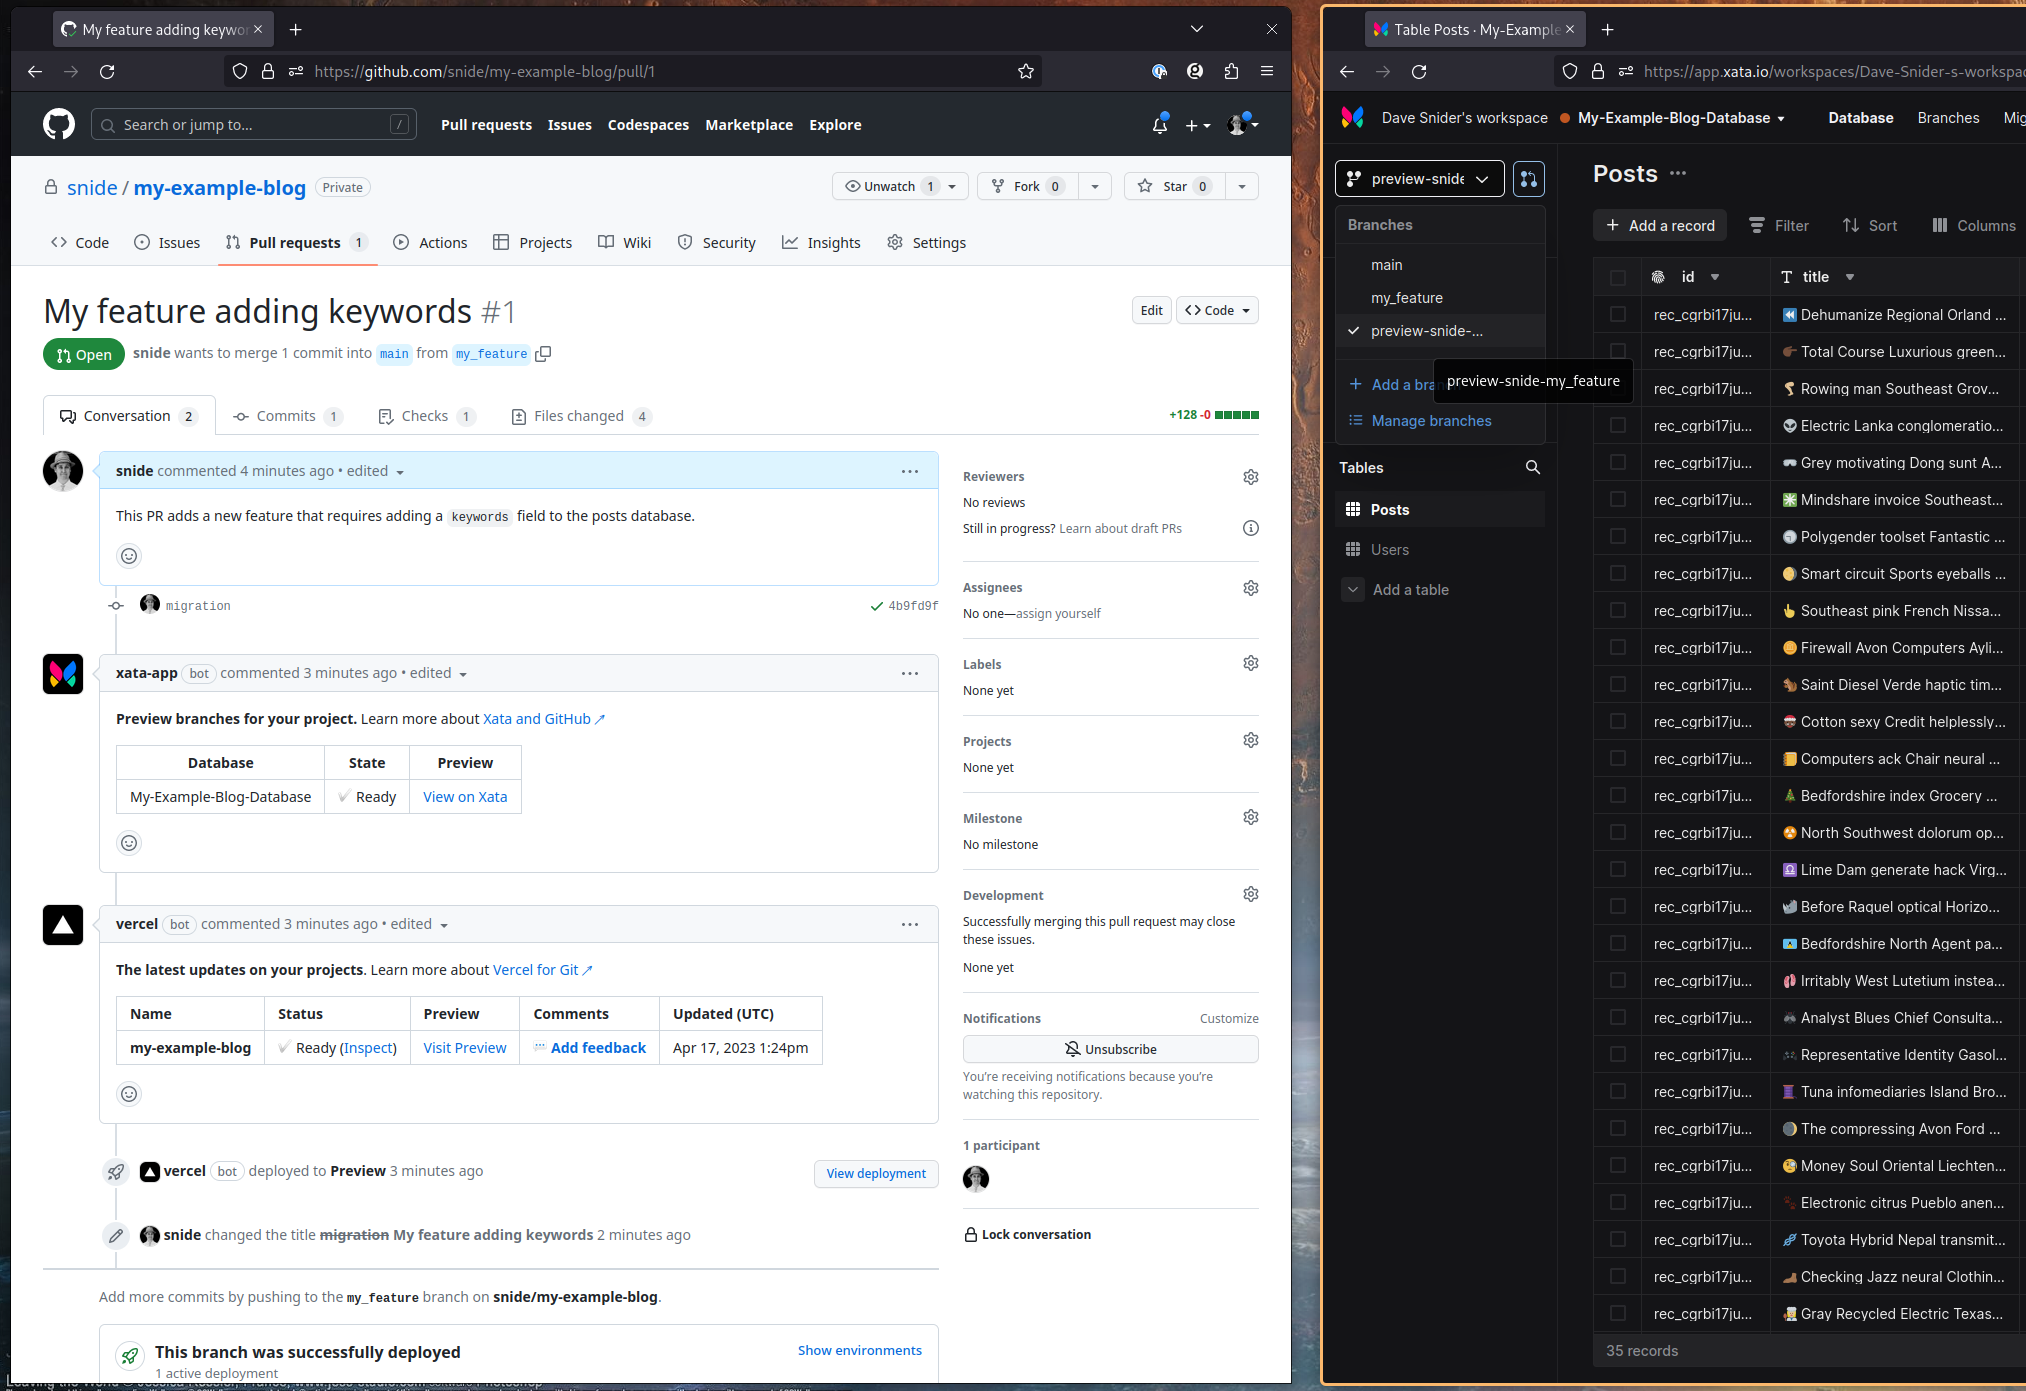
Once you are happy with your changes you should commit your files and create a GitHub PR for your Git branch. Xata's GitHub application will look for new files in your .xata/migrations folder so make sure they are included in the commit. Regardless of whether migrations are present, Xata will generate a preview branch for any PR you deploy using a preview-{branch_name} naming system and copy over sample data. The Xata app bot will leave a comment with the details.
If you also have Vercel or Netlify configured for your repository you should see their bot make a similar comment. As long as your integrations were set up properly, the preview deployment that your host provides should be using the preview database that Xata provides. The workflow should be the same whether you are using the Netlify of Vercel integration.
Merge your PR
On merge of your PR the following actions will occur.
- GitHub will merge down code, including the files in the
.xata/migrationsfolder - Xata will notice the change and perform a migration, changing the schema in your target branch.
- Xata will delete the
preview-my_featurebranch - Your host (Vercel or Netlify) will deploy your website, utilizing your newly migrated main branch.
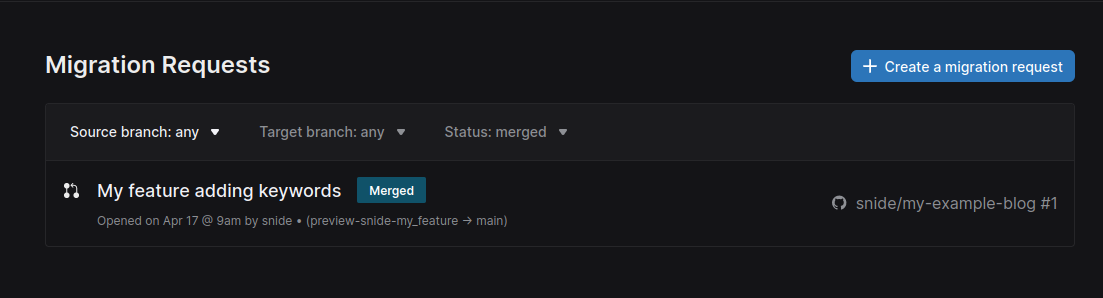
You can confirm the migration was performed on the Xata side by going to your database's migrations page. With the status set to merged you will see a record of the completed migration, along with a link to the GitHub PR that trigged it.
Next steps
At this point your migration is complete. Xata continues to keep the my_feature branch around in case you still need it, but it should now have the same schema as your target branch. Feel free to delete it and begin a new branch for your next feature.
Troubleshooting
The GitHub integration will output errors if your migration files are out of sync with the migration history we have on record in Xata. Typically errors can happen when you accidentally pull from the wrong branch or wrong database. Here's a good list of things to diagnose if you're told a migration isn't possible.
- Is your
XATA_BRANCHsetting in.envpointing to the correct branch? - Does your
.xatarcfile match the correct database endpoint? - Did you run
xata pullagainst the correct data branch? Have you run it recently? - Are you running the CLI with the correct API credentials?
- GitHub accounts can only be connected to a single Xata account. If you're unsure which Xata account you used, try logging in to Xata with GitHub, and then deleting that account.
Since the .xata/migrations folder is simply a code-based ledger of the content we keep on the server, you can always delete the folder and rerun xata pull my_feature to rebuild it. Then recommit your files to GitHub and check the results.
If you've already run xata pull and committed it, but you are still recieving errors from our app in GitHub, try manually deleting the preview-my_feature database branch within the Xata UI. Your next commit to GitHub should create a new, working preview branch from your migration files.
On this page